Get Started
This page explains the general operations and functions of VRHandsFrame.
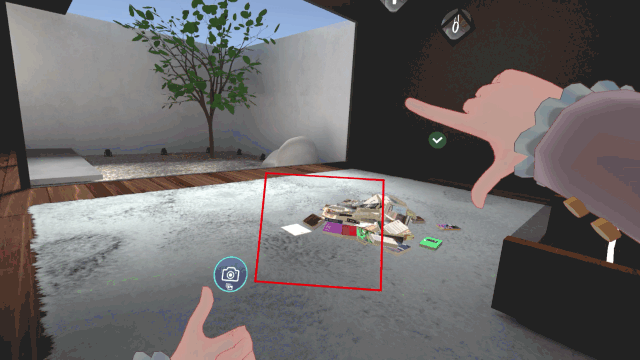
Generating the Frame for Cropping
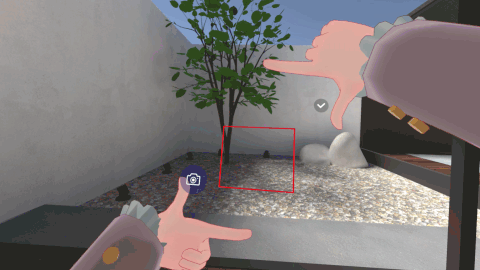
To perform VRHandsFrame functions, you need to generate the frame and crop the field of VR view using hand gestures.
While pressing the grip buttons on both hands, bring both hands close together and make a gesture of creating a frame with both hands.
Try posing with one palm facing towards you and the other palm facing outwards.
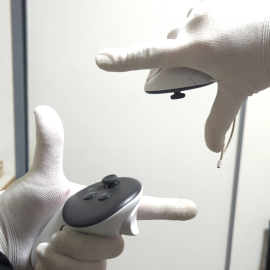
Once the hands gesture is recognized, the frame is generated between your hands.
VRHandsFrame General Functions
VRHandsFrame allows you to perform the following functions on the cropped image.
- Preview, Save, and Share (Photo Function)
- Character Recognition and Translation
- Scanning 2D codes
Preview, Save, and Share (Photo function) 
You can preview the cropped image and save or share it. Since it crops the view in VR, if another overlay app is running, the UI may be reflected in the image.
The resolution of the cropped image depends on the settings of SteamVR and your head-mounted display.
The higher the VR display resolution, the longer the cropping process will take.
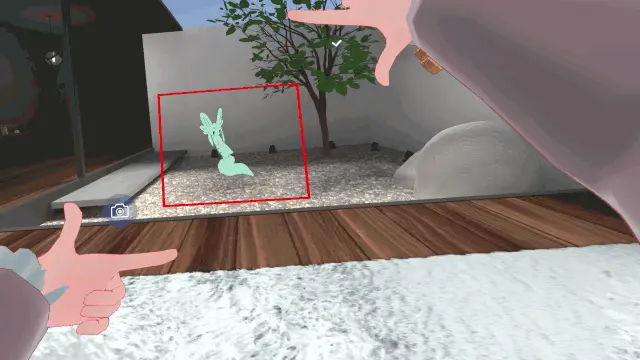
Character recognition and Translation 
VRHandsFrame recognizes the characters in the captured image and performs machine translation.
There are daily and monthly limits for each account.
When the limit is reached, the engine will automatically switch to a less loaded alternative engine on the server.
The alternative engine may have lower character recognition accuracy, translation accuracy, and speed.
Scanning 2D Code
VRHandsFrame analyzes the 2D code contained in the captured image and displays the results.
If the scanned result is a URL, you can open the link in your desktop browser.
It will be easier to recognize if you frame the 2D code from the front, without tilting it as much as possible.
Also, if the VR display resolution is too low, the 2D code may not be recognized.
Switching Modes
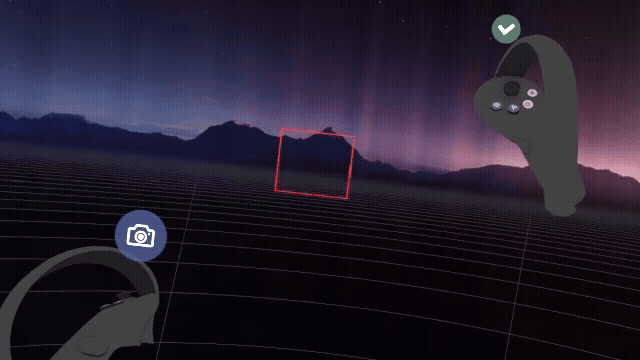
While the frame is being generated, icons are displayed on both hands.
Before finalizing the cropped position, you need to specify which function to use.
You can switch modes by pressing the trigger button on the hand that has the icon for each function ![]()
![]()
![]() displayed.
displayed.
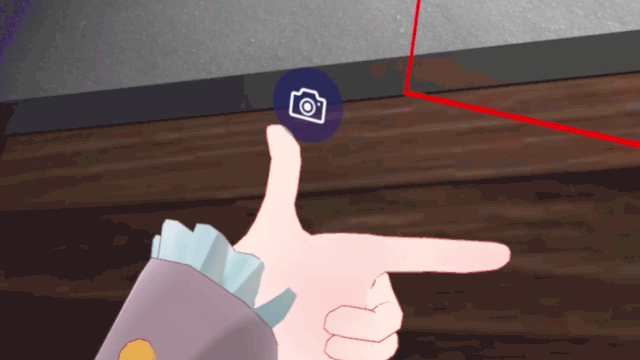
The mode changes in the following order;
Photo → Translation → Scanning 2D Code → Photo ...
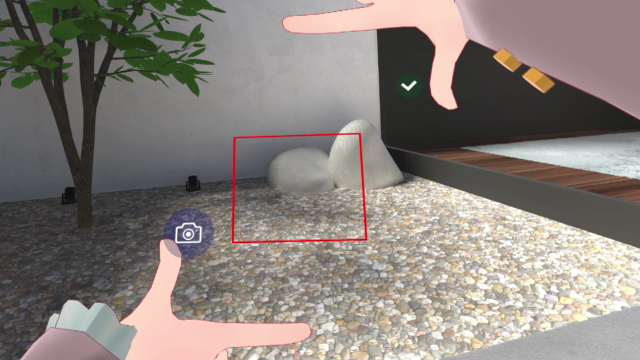
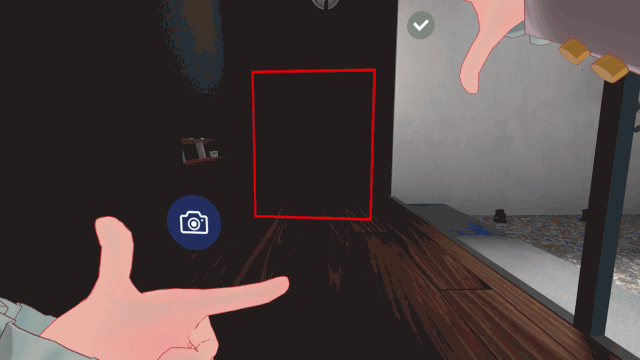
Determine the Crop Area
You can change the crop position and size of the frame by holding down the grip button and moving the controllers.
Keep both grip buttons pressed down until you have confirmed the frame range.
Perform the Assigned Function
To execute functions, press the trigger button with the check mark icon.![]()
The result of cropping will be displayed on a newly generated panel.
If your controller has an analog stick,
you can also adjust the frame size by tilting the right stick up or down.
GIF Animation Recording
When Photo mode is selected, you can capture GIF animation images by holding down the confirmation trigger ![]() .
To end animation recording, release the confirmation trigger.
.
To end animation recording, release the confirmation trigger.
Repeat Feature
You can toggle the Repeat Mode by holding down the trigger button on the hand that displays the function icon![]()
![]() .
.
When the Repeat Feature is enabled and you confirm the frame range, the results are displayed in a single panel.
The Repeat Feature is available when Photo Mode or Translation Mode is selected.
Start the Self-timer
If you press both trigger buttons simultaneously while generating the frame, the self-timer will start.
The frame will be fixed in the position at the moment you release the trigger buttons.
The number of seconds remaining on the self-timer can be determined by the progress of the frame color change.
After the self-timer countdown has finished, the assigned function will be executed.
While the self-timer is counting, you can grip the frame itself with one hand and fine-tune its position.
Gesture Detection ON/OFF
You can toggle gesture detection ON/OFF by tapping the button consecutively.
Use this when you want to temporarily turn off the function to avoid accidental operation.
By default, the function is executed by tapping 4 times.
You can change the number of taps required or assign a different function.
For details, see Shortcut Settings.
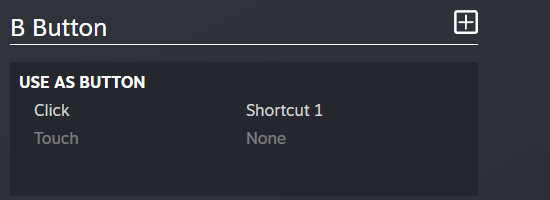
For Quest-type Controllers
By tapping the thumb-rest position consecutively.

For Other Controllers
Set "shortcut1" or "shortcut2" to the desired button input(Click/Touch) in SteamVR's controller bindings.